This article will guide you on the steps necessary to setup the connection from your Windows 7/8/10 computer to a file share. Credentials and the necessary connection address will be provided to authorized users by IT in a welcome email.
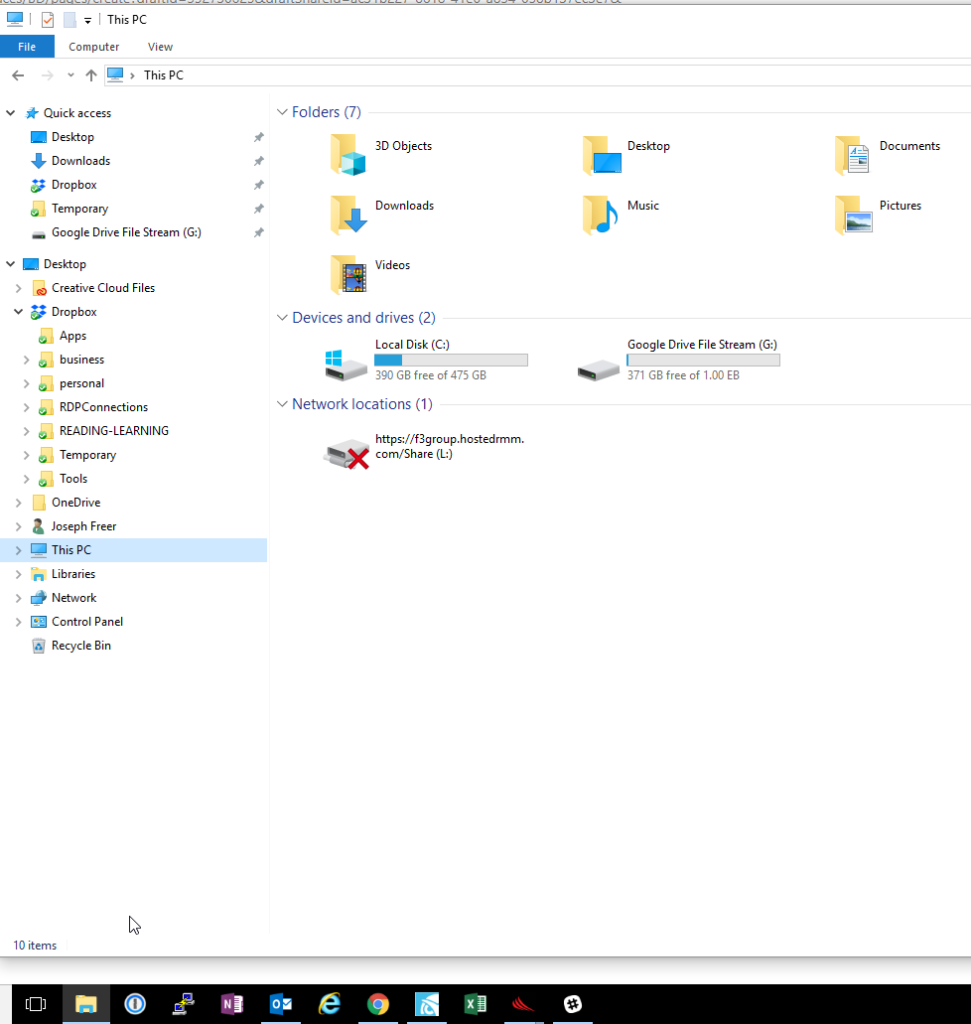
- Open File Explorer and click on THIS PC on the left side menu
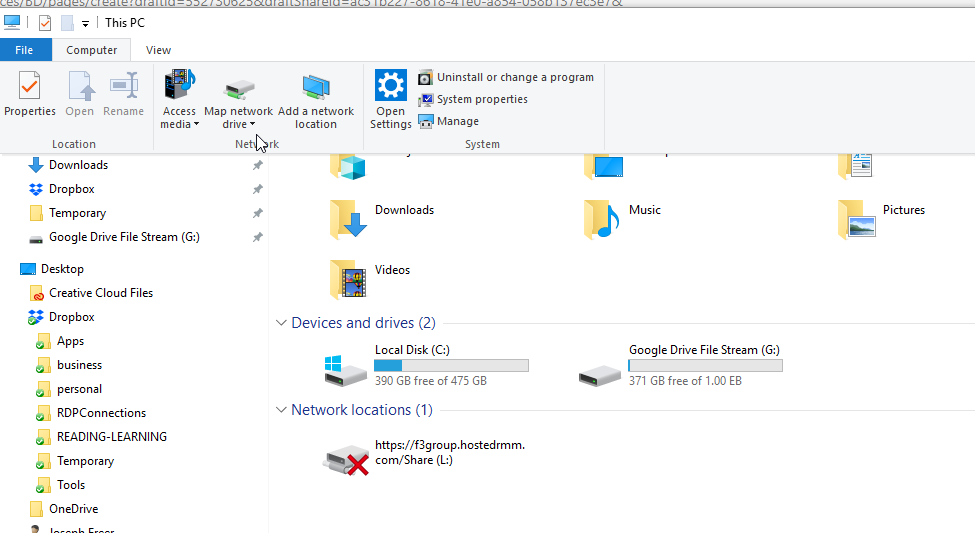
- On the top menu, if it does not look like the menu below, click on COMPUTER to expand the panel and reveal MAP NETWORK DRIVE, click on MAP NETWORK DRIVE
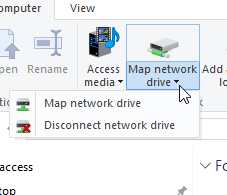
- Click on MAP NETWORK DRIVE
- On the Map Network Drive window that appears, change the drive letter to T for “Team Share”. If you already have a T drive exit out, and then right click on it to choose DISCONNECT. Then start at #1 above. IT will advise you of the appropriate drive letter in your welcome email.

- Enter your connection info provided by IT in the welcome email in the folder field, and click FINISH. The address will be in the format: \\10.1.x.x\TeamShare
- A separate login window will appear, enter your username and password and click OK
- The network connection will complete and open in a new window. You can now find this connection under THIS PC as the drive letter specified above.


