Desktop Only: This procedure must be done from a desktop or laptop computer running Microsoft Outlook. It will not work if attempted from a smartphone or tablet (iPhone or iPad etc). Outlook must be already configured for your work email.
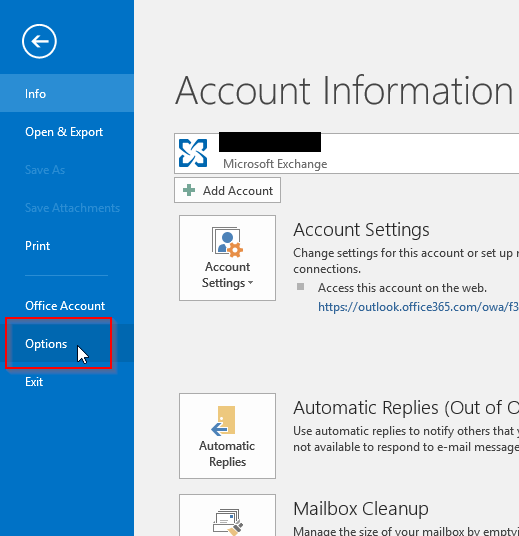
- Open Microsoft Outlook, and click on FILE in the upper left hand corner

- Click on Options
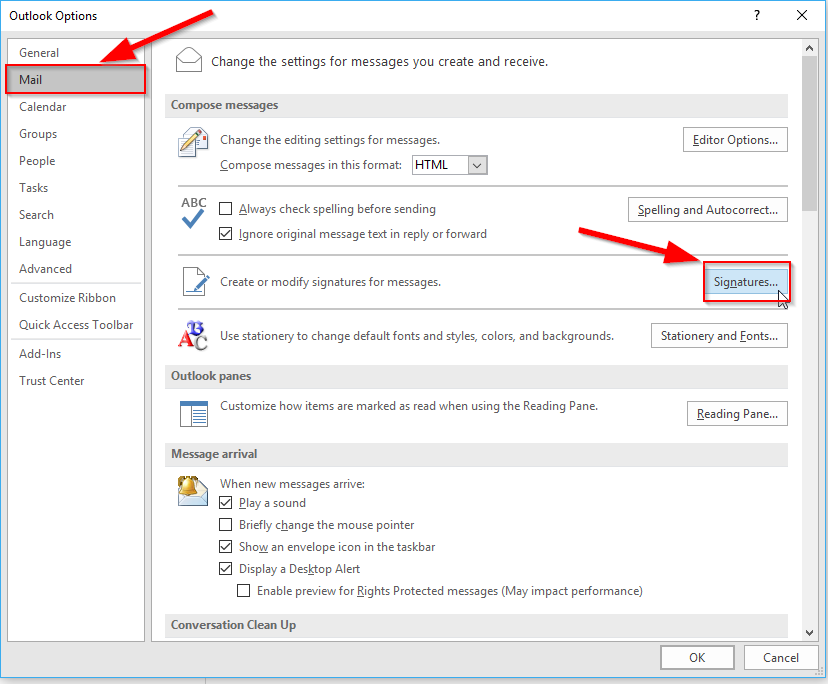
- Click on “Mail” on the left side menu, then Signatures on the right side pane next to “Create or modify signatures for messages”.
- Click NEW to create your signature:

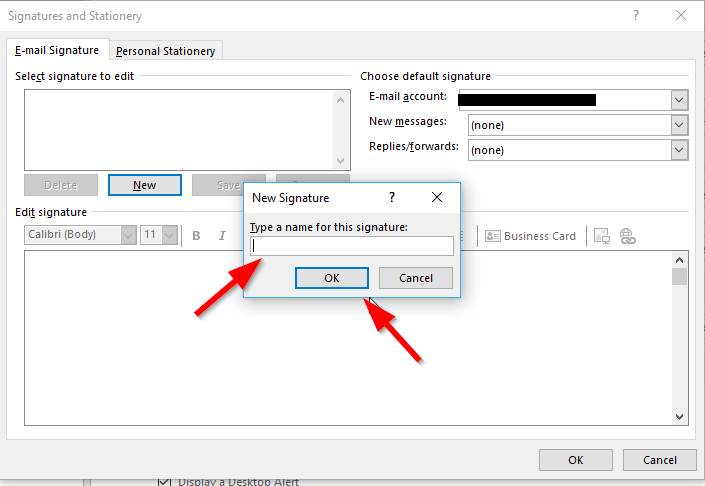
- Name your signature. The name is not important, you can call it “My Signature”. Click OK after you typed in the name.
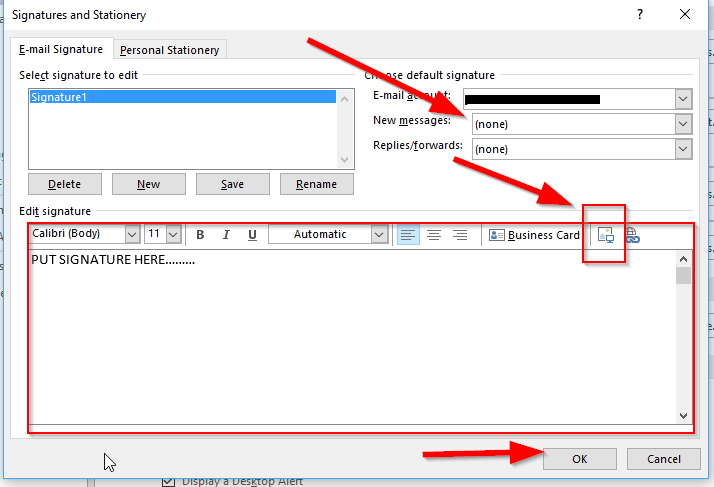
- Once you click OK in the step above, you will be returned to the signature screen. Create your signature where it says “Edit Signature”. You can adjust the font, size, color etc from the toolbar shown. You can insert images by clicking on the picture icon (highlighted in red, second from the right). A sample signature is included in the files section at the bottom of this article. Once the signature is created, choose to apply this to “New Messages” and if you wish, “Replies/forwards” and then click OK.
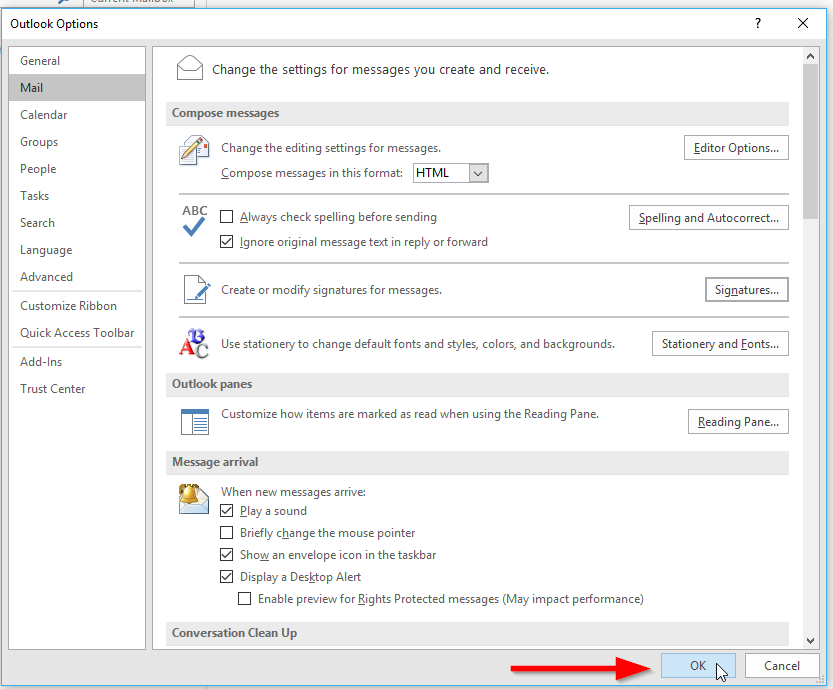
- The Signature window will close and you will be returned to the Outlook Options menu, click OK to close this menu and return to your Outlook inbox.
REMEMBER: This will set the signature for Outlook only. If you use webmail you need to set your signature there as well, please refer to the article on how to setup webmail signatures. Mobile devices (phones/tablets) also must have the signature individually set – they do not transfer between the three systems!

