This article will show you how to setup email on your iPhone/iPad. You must have your own Apple iPad or iPhone running the latest Apple iOS operating system. For this article “iOS” will refer to the system that runs on your iPhone and iPad interchangeably.
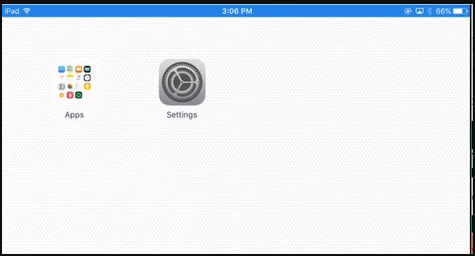
- Open the SETTINGS icon on your iOS device:
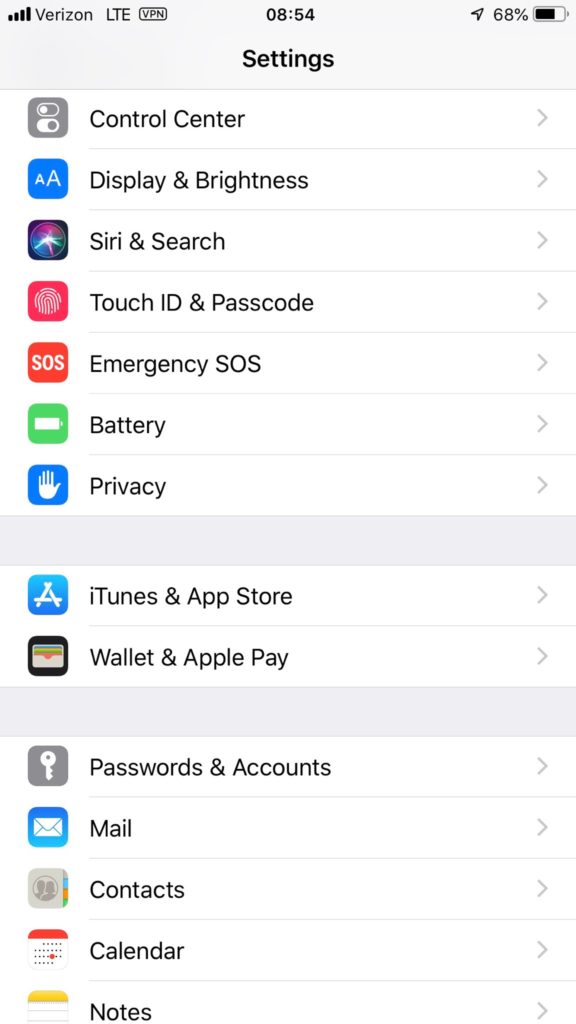
- Locate PASSWORDS & ACCOUNTS on the left side menu, tap on ADD ACCOUNT:
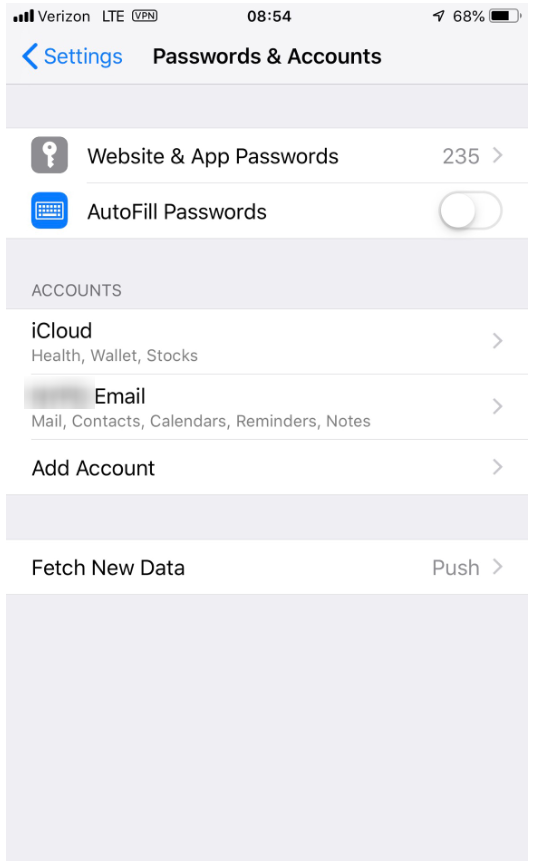
- Next, tap on ADD ACCOUNT on the right side menu:
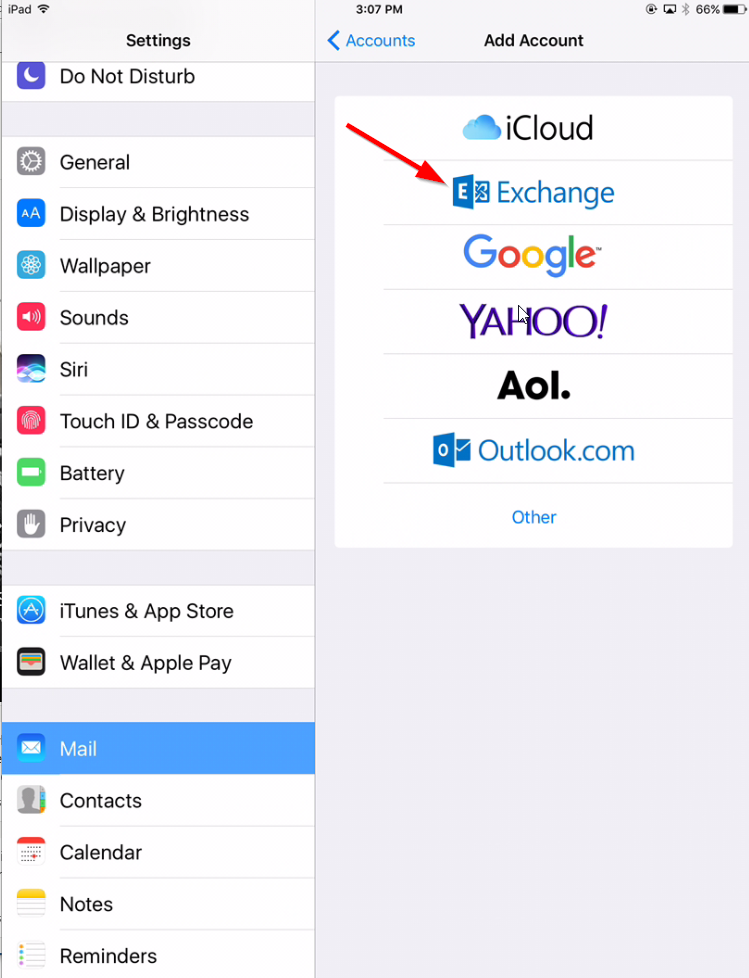
- Office 365 utilizes Microsoft Exchange, tap on EXCHANGE on the right side menu:
- In the resulting pop-up box, enter your full email address in the EMAIL field. Enter Exchange in the DESCRIPTION box and tap on NEXT on the top right side of the box:
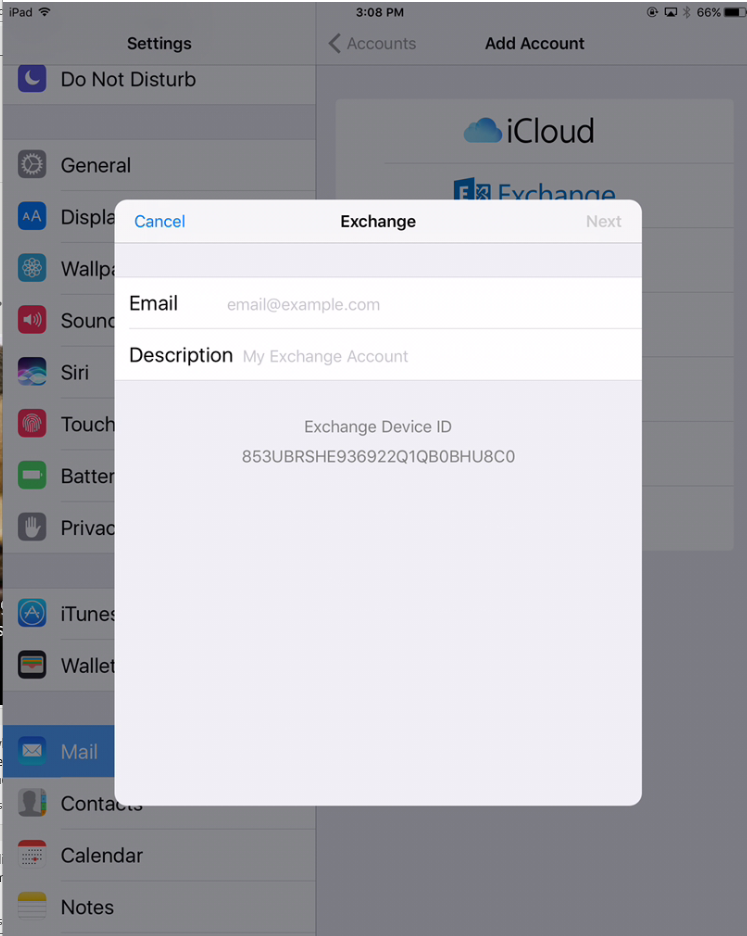
- The account will go through an auto-configuration process and should complete automatically. If the account does not auto configure, you will need to contact support.
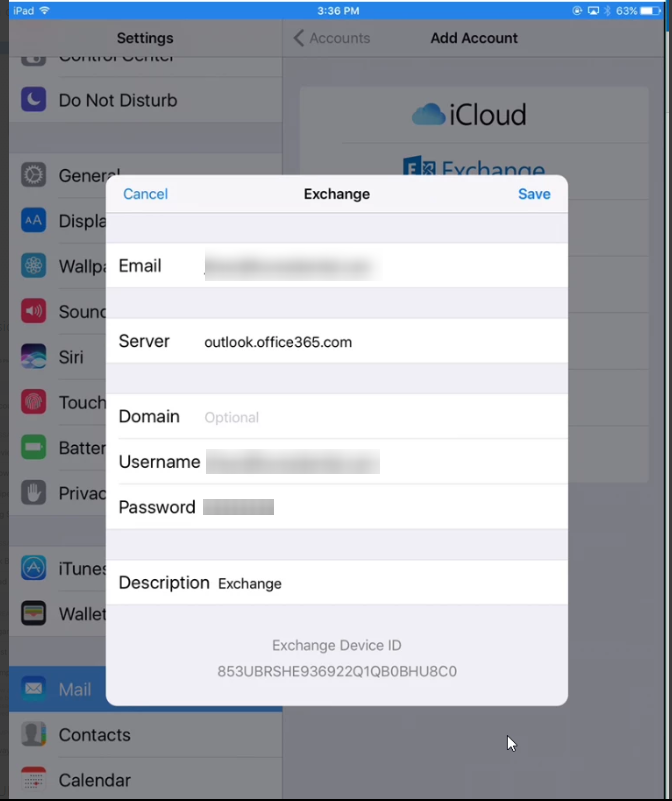
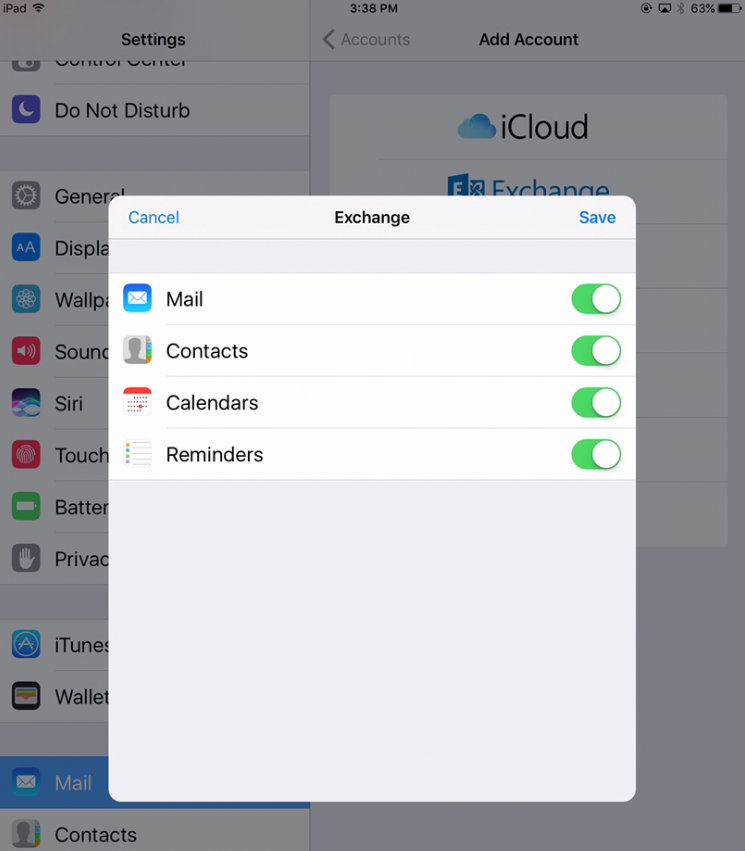
- Confirm what you want to sync, typically all options are green. Tap SAVE:
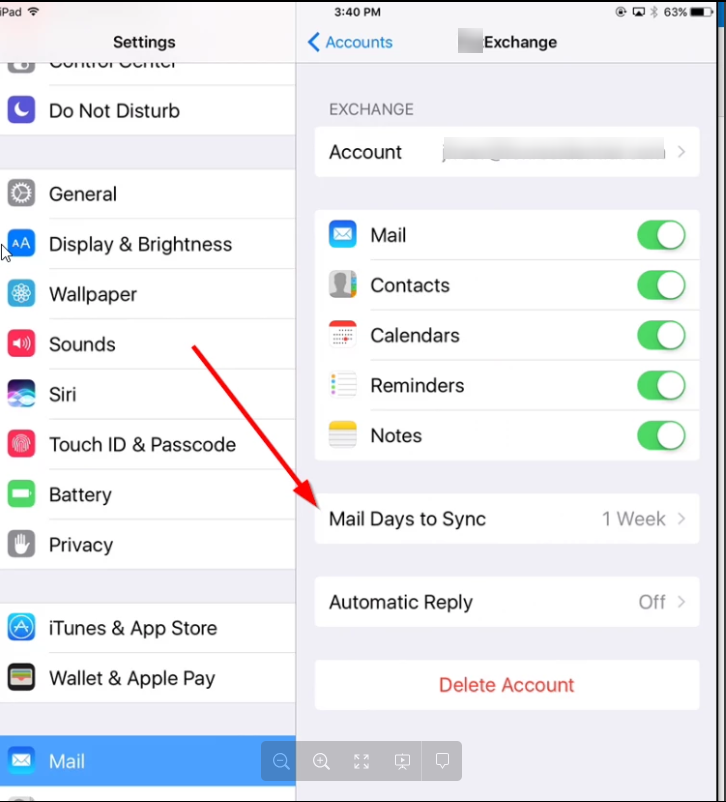
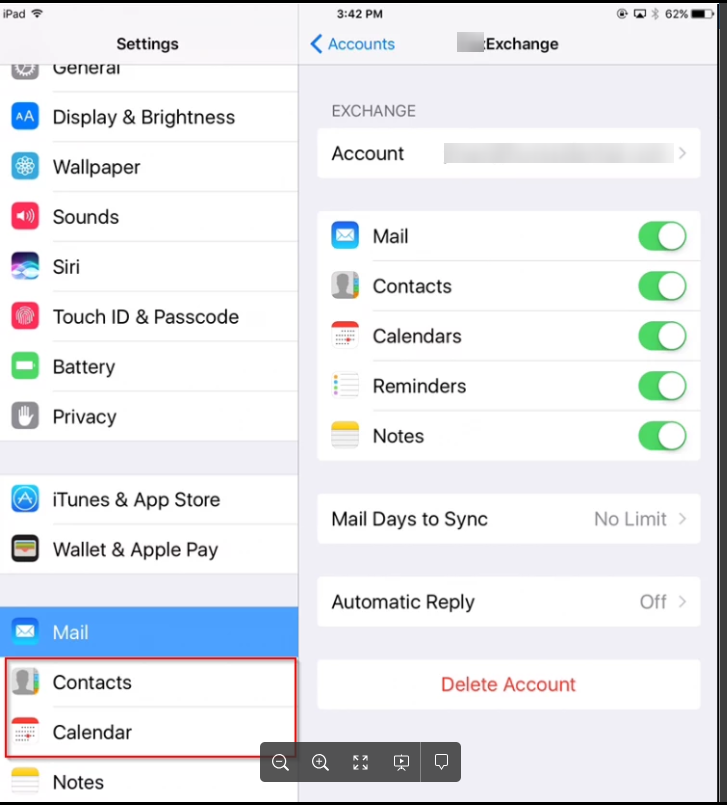
- By default, only the last week of mail is sync’d to your device. To change this, tap on your Exchange account on the list of Accounts, tap on “MAIL DAYS TO SYNC” and change it to another value, such as “NO LIMIT” (**NOTE: If you have a large mailbox this will take longer to sync!)
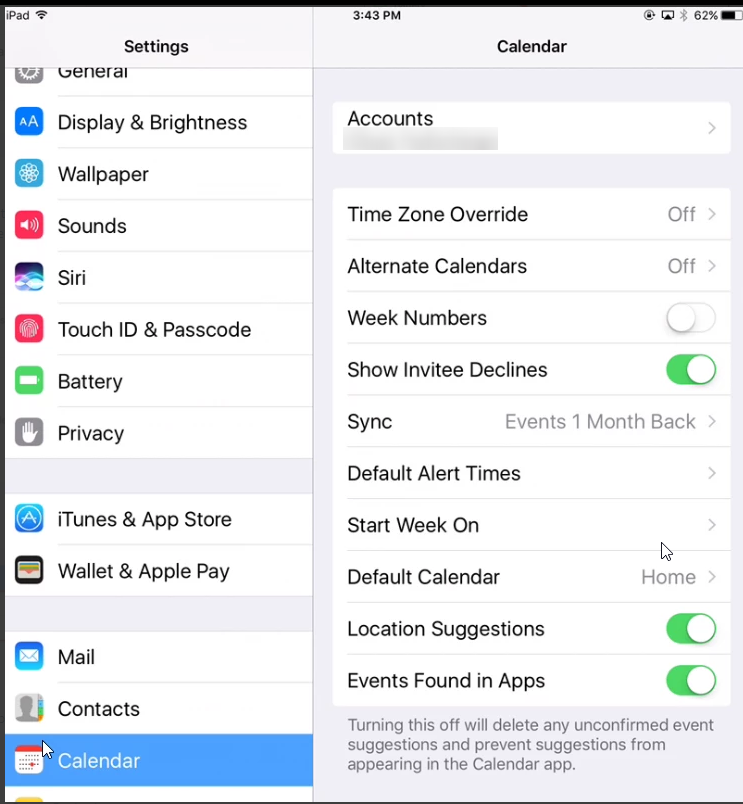
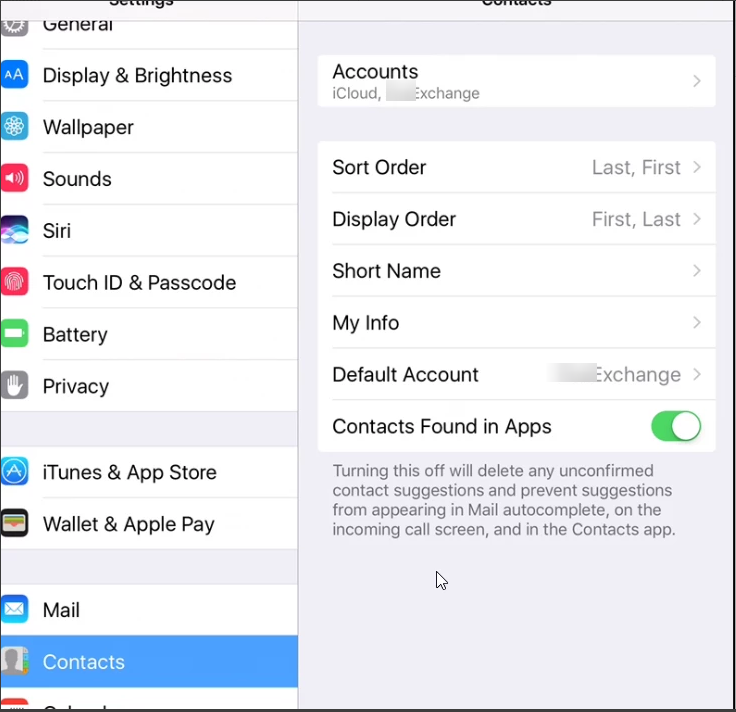
- You should now set your Exchange account as the default for Calendar and Contact entries. This ensures contacts/appointments you enter will sync to your account. This is OPTIONAL if you use another service, but recommended! By default, only the last month of Calendar entries sync, you can change that from the Calendar screen under SYNC.
- That is it! You can press the center home button to exit the settings menu.
