This article will describe how to setup the native Mac Mail program to work with your Microsoft Office365 Email
These steps will only work on a Mac computer running at least 10.10 (“Yosemite”) or later. Find your version by clicking on the Apple logo in on the top left of the screen, then click on “About this Mac”
Step-by-step guide
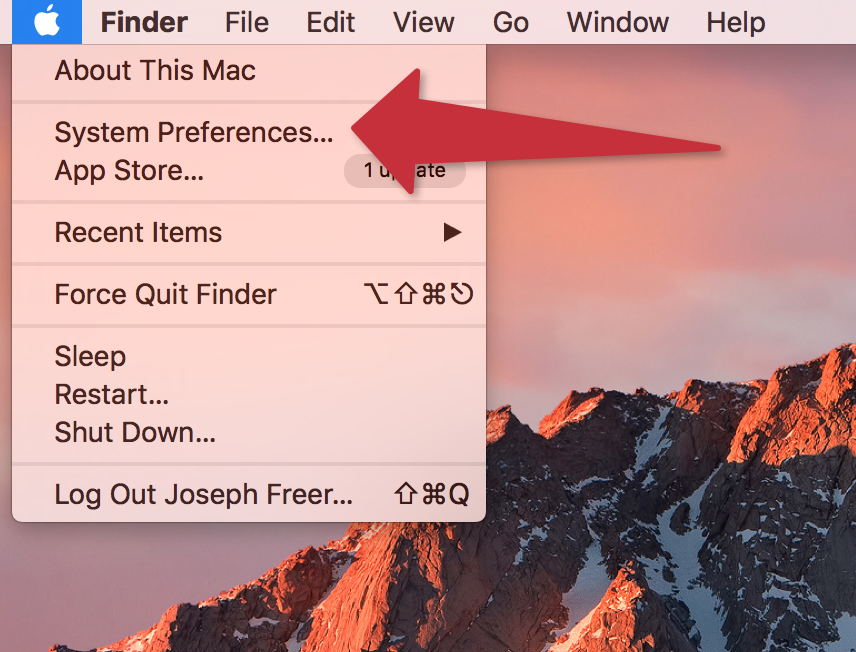
- Open System Preferences. You can click on the Apple logo on the top left of the screen, then on System Preferences in the drop down menu, or if you have the System Preferences Icon in your dock, click there.
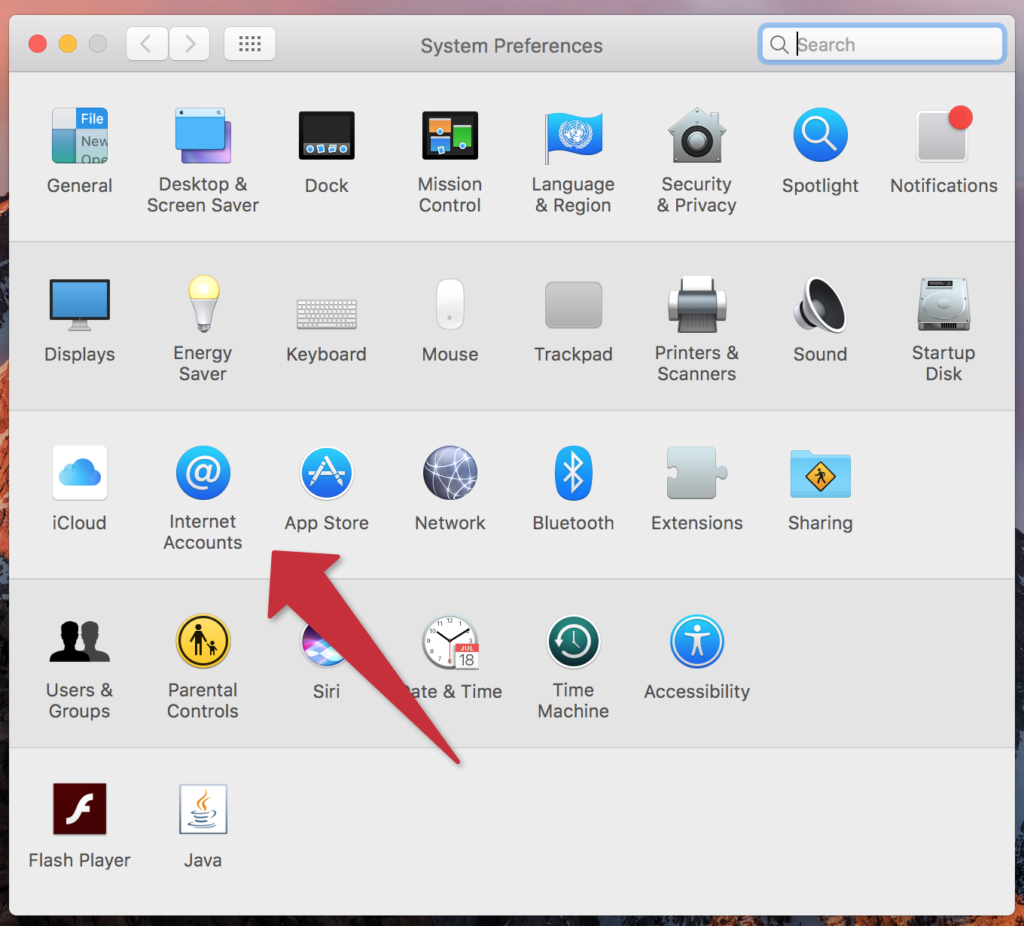
- In the System Preferences window, click on “Internet Accounts”
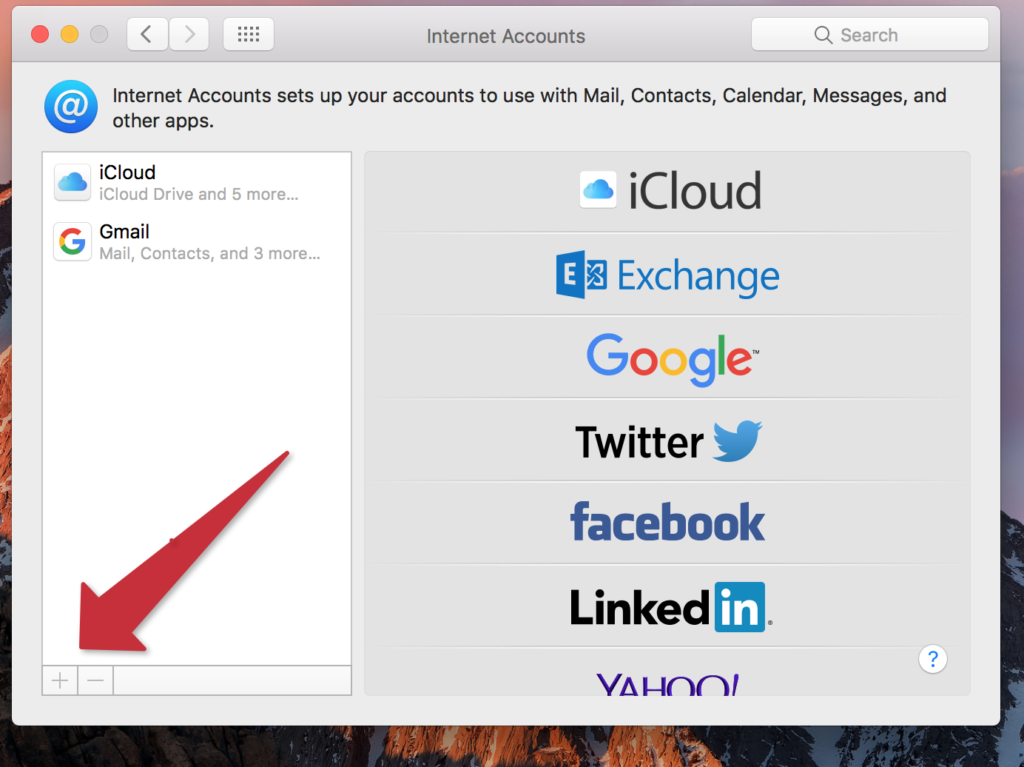
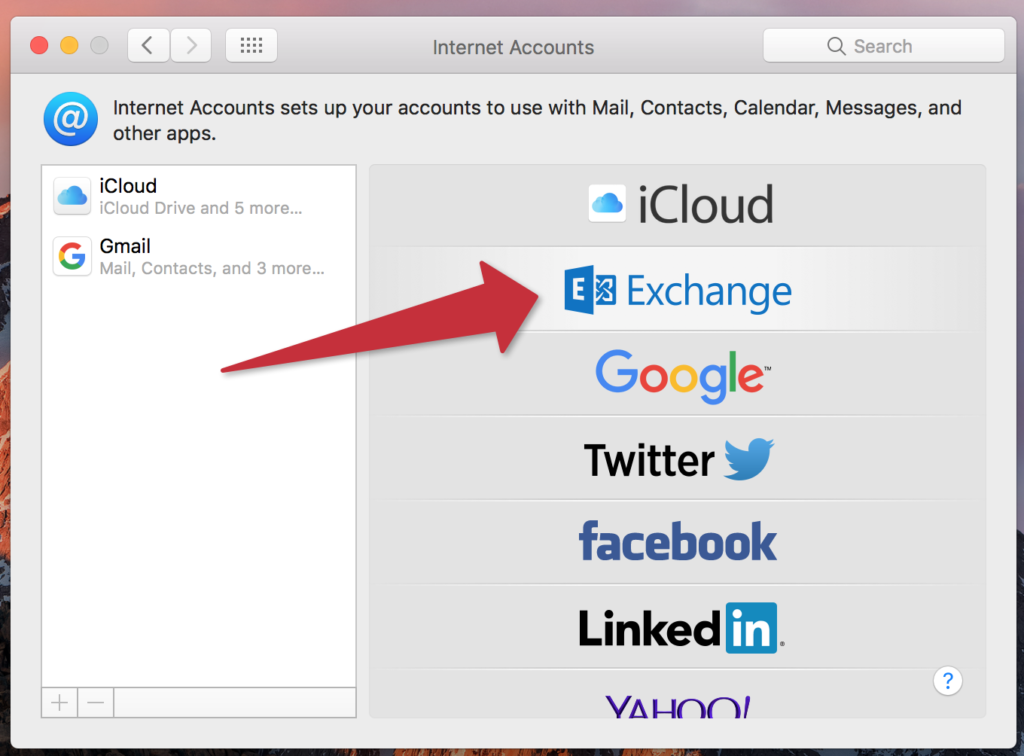
- In the Internet Accounts window, click on the plus sign on the lower left to bring up the new accounts menu. Click on Exchange on the right side listing of new accounts to add
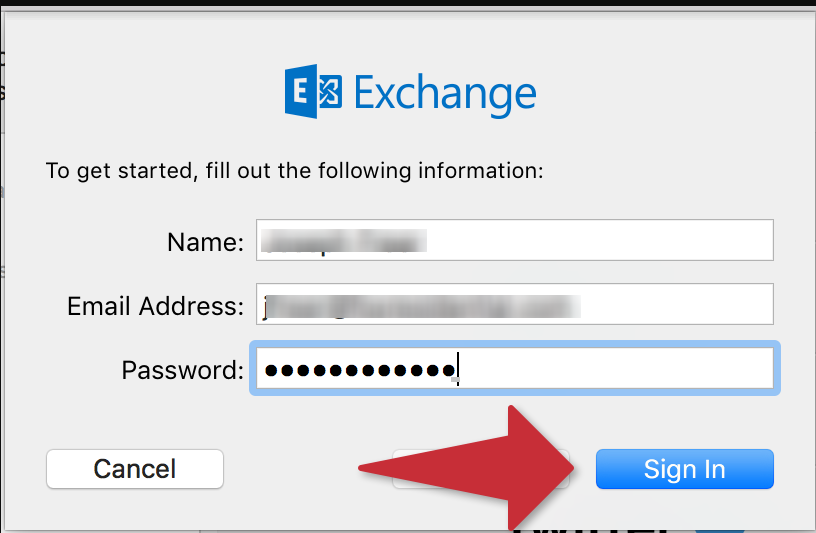
- Enter your full name, email address and email password in the spaces provided, then click Sign In
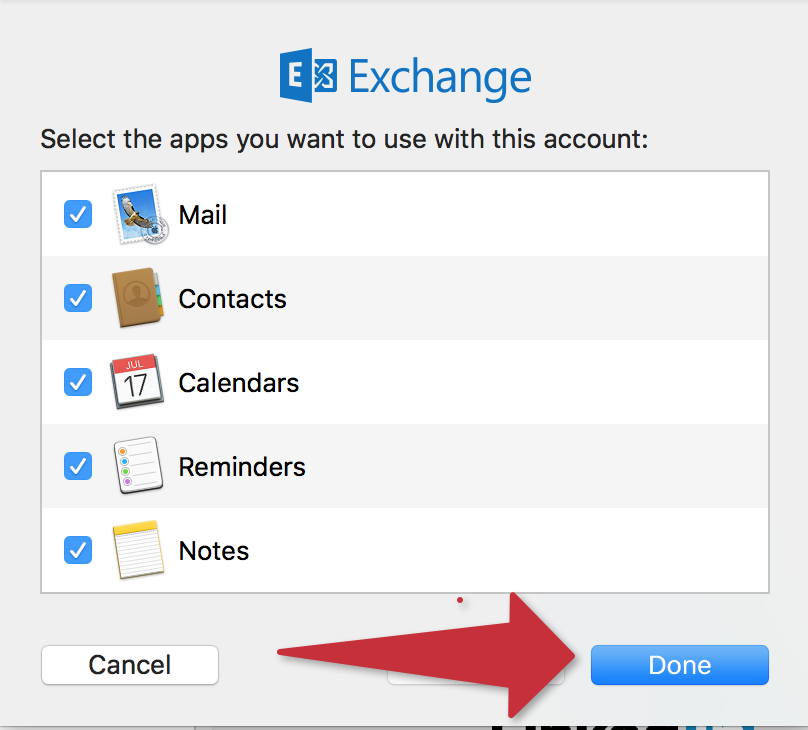
- If you wish to sync your Contacts with the Apple Address Book, and your Calendar with iCal leave those boxes checked. Typically you should leave all the boxes checked. When you have finished your selection, click Done
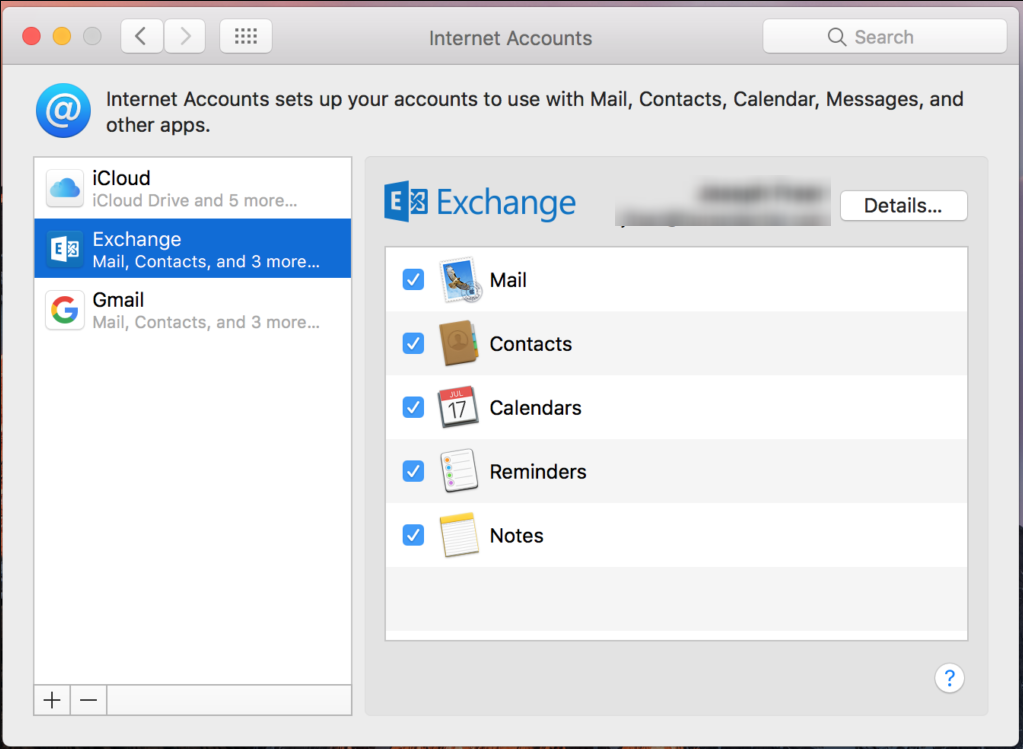
- The account will now be added to your list of Internet Accounts
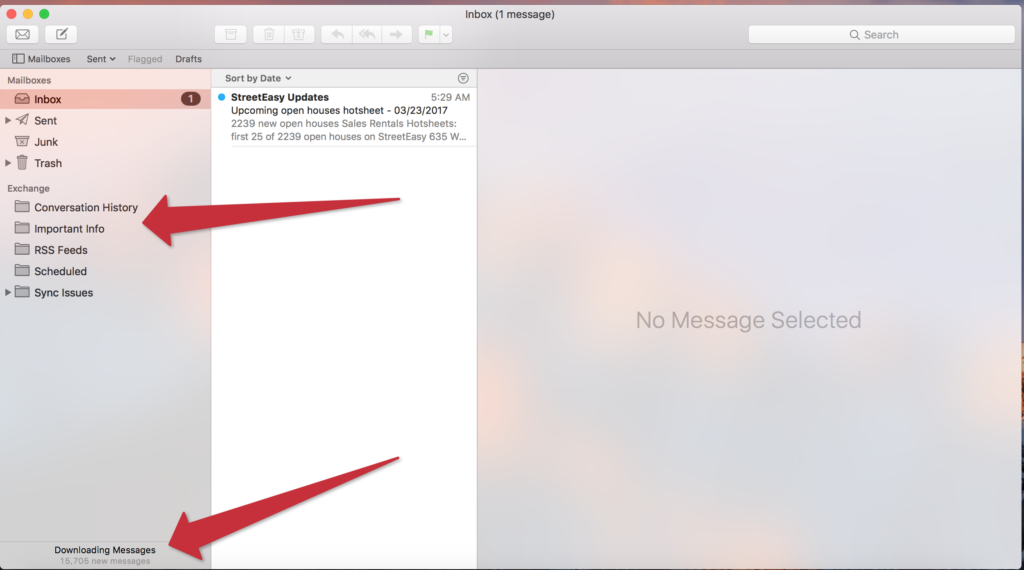
- Close the window by clicking on the red ball on the top left of the Internet Account window, this will return you to your Inbox. You will see that the system is downloading your messages and your folders will begin to appear.
Warning!
Large mailboxes may take several hours to fully sync!! Please leave Apple Mail open, and your computer online and awake for it to sync. You will see the progress in the status section located in the lower left side of Apple Mail. The photo example in step 7 above shows that there are over 15,000 messages remaining to download.
